

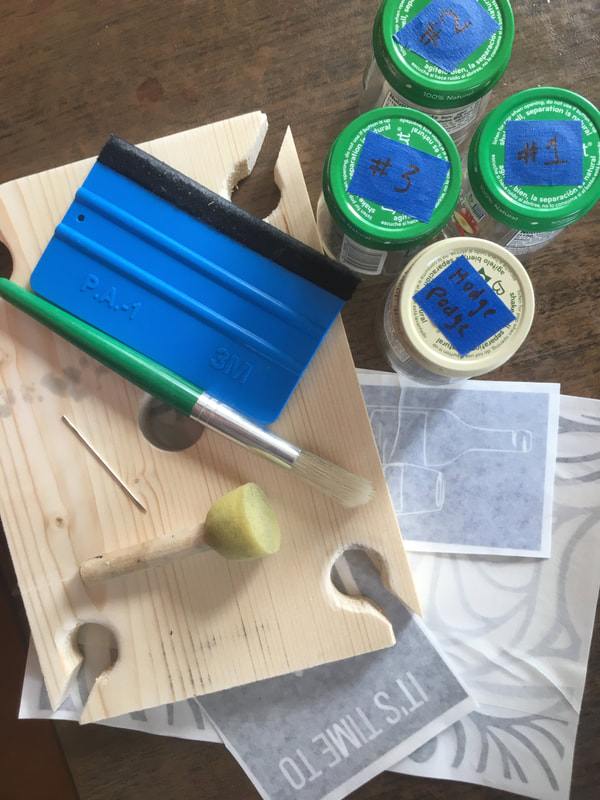
Supplies...Your DIY Kit contains...
Step 1: Prep Your BoardWith your sand paper, lighting sand around edges of board and holes as well as any rough spots you may notice. Step 2: StainIn Jar #1, you should have the color of stain you chose for your board. With a paint brush, lightly coat your entire board with your stain. Be sure to cover the inside spaces created by the drilled holes and cut marks as well as the edges and backside of your board. Using the small piece of fabric provided, wipe off your board at the end to lift any excess stain.
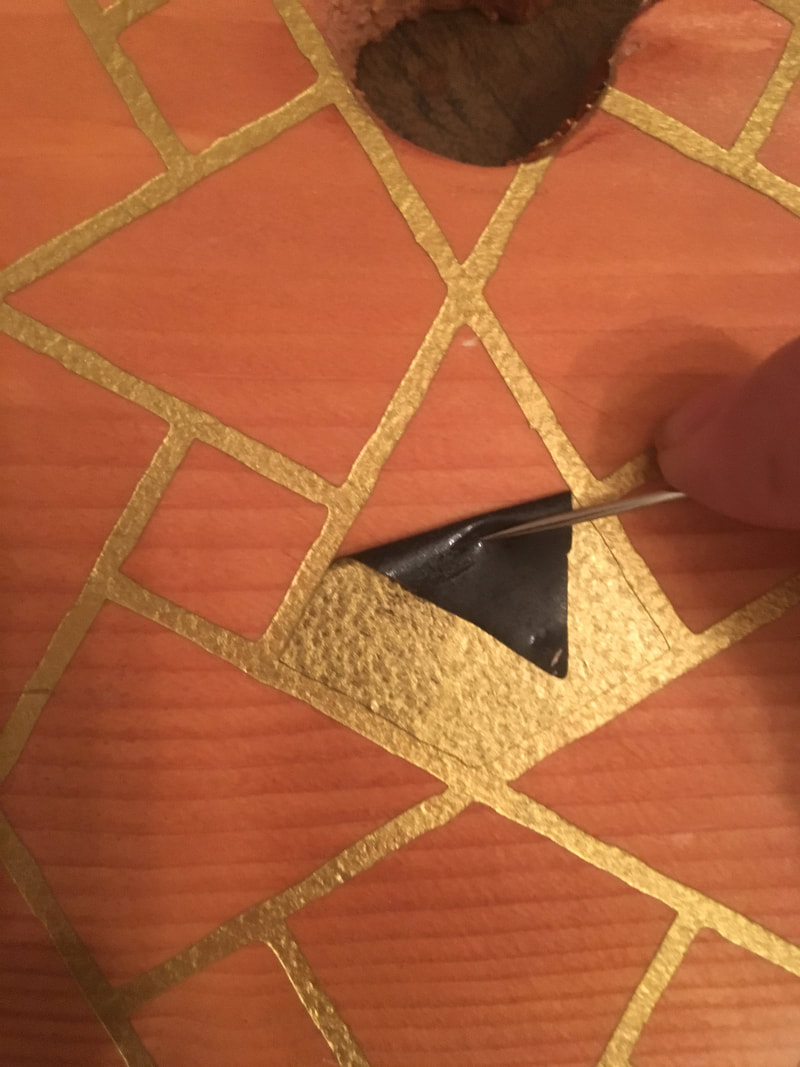
Step 3: Pattern Stencil (#1)Preparing the Stencil: Give your board plenty of time to dry. Do not be afraid to take a break from your project for an half hour or so to ensure that it is dry. To prepare your stencil, you will first need to peel off the paper that has grid lines on it. Being that these are detailed patterns, the best way to do this is to roll the backing off of your stencil very carefully like the back of a sticker. Instead of pulling the paper upwards, roll, or slide it at an angle away from the corner. If any stencil pieces start to peel up with the paper, use your needle tool to help stick them back down.
Peel the Backing: At this point, you are ready to peel the final backing to reveal your stencil. Similar to the first step of this process, roll the paper away from the corner keeping it as flat as possible. If you notice pieces of your stencil peeling up, simply press them back down onto your board using your fingers or your needle tool.
Step 4: Paint your StencilModge Podge: Using your circular dobber tool, gently wipe a thin layer over top of your stencil. The modge podge dries clear and helps to create a seal between the edges of the stencil and the board. This helps to prevent paint from leaking under you stencil. After you apply the modge podge, let it sit until it is clear and dry to the touch.
Paint: After your modge podge is dry, choose the color of paint you would like to use for your stencil and begin to gently blot a THIN layer of paint over top of your stencil using your circular dobber tool. You may choose to do more than one coat of paint to achieve a brighter, more opaque color. That is up to you. Give your paint plenty of time to dry.
 Step 6: WordsAfter your board is completely dry, follow steps 3-5 to apply and paint your words on to your board. You can choose the placement of your words, as well as which color to use. IMPORTANT: do not FORGET that you need to peel off the paper with the grid lines first! You will know you did this correctly when your stencil appears to be backwards before you stick it onto your board. See the images below taking you through this step. HINT: When you are applying your paint with your circular dobber brush be very careful not to get any paint on the outside edge of the stencil. This will get on your board and be difficult to remove. Step 7: ImagesAfter your words are completely dry, follow steps 3-5 to apply and paint the image stencil you chose (either a bottle and a glass or just a glass). You can choose the placement of your image, as well as which color to use. IMPORTANT: do not FORGET that you need to peel off the paper with the grid lines first! Do not forget to be very careful not to get any paint on the outside edge of the stencil. This will get on your board and be difficult to remove. HINT: You can get creative with your placement of the image. It is ok if it hangs off the edge a little bit or is upside down compared to your lettering. See images below Step 8: ENJOY!!!After your board is completely dry, load it up with your favorite bottle of summer wine and glasses to share. Enjoy yourself, your hard work and your beautiful creation. Snap a picture and share it with me if you can!!!
0 Comments
|


 RSS Feed